How To Pickle Wild Mushrooms
Wild mushrooms often come in large gluts so its good to have a range of ways to preserve them. Here I outline some general principles for pickling mushrooms, with advice on suitable species, mushroom pickling techniques, recipe ideas, plus information on storage, shelf life and serving suggestions.
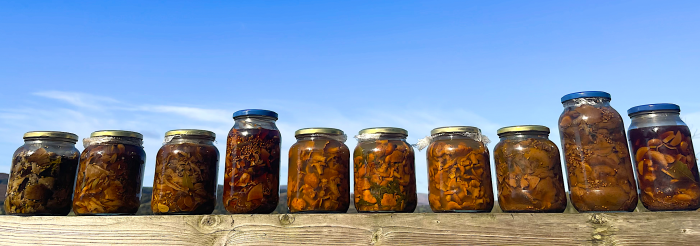
Pickled wild mushroom selection. ©GallowayWildFoods.com
Which mushrooms are best for pickling?
You can pickle any edible mushroom. Some give better results than others in terms of flavour and texture, but your choice of what to pickle might also be influenced by what you have in abundance. In general, avoid soft textured mushrooms, whether that is a species characteristic, or to do with the age and condition of the specimens: the younger, firmer button stage (if the species has a button stage) will give best results.
I don’t recommend pickling as a way to “rescue” gnarly old specimens – dehydrating, cook-freezing, or making “mushrumami” are better techniques for rescuing past-their-best mushrooms.
Below are my go-to mushrooms for pickling, in no particular order. Each species brings something different to the table, whether it’s flavour, texture, looks or any combination of the three. If any of these species are new to you, I recommend reading up on their general characteristics in the links i’ve provided, as some are more “digestible” than others.
Chanterelles – The firm buttons, where the caps are still more or less convex (ie. not yet funnel shaped) up to about 4cm diameter give best results and look great. Larger mushrooms can still give good results provided the flesh is firm, but avoid pickling the large, wet, slippery-textured beasts that you find later in the season. To echo and enhance their somewhat fruity aromatics, I like to infuse my chanterelle pickling vinegar with something fruity such as pineapple weed and/or use apricot syrup as the sweet element.
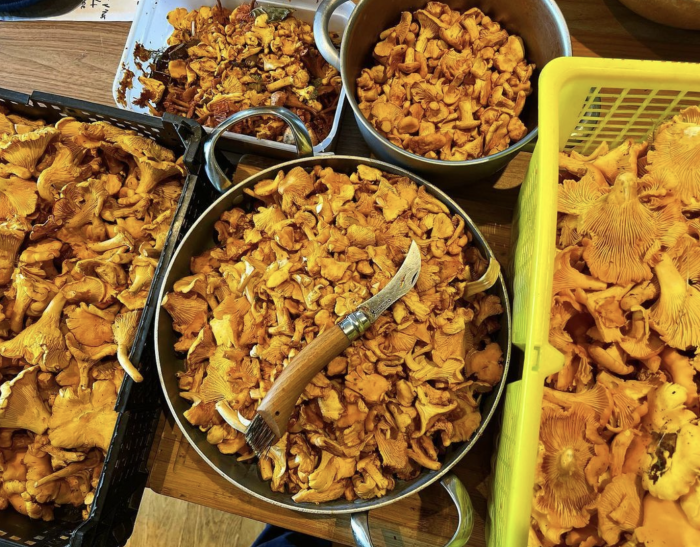
Grading the chanterelle harvest. I use the small, firm 2-4cm diameter buttons for pickling, or larger ones that are still firm
Hedgehog mushrooms – Firm buttons give the best results, but hedgehog mushrooms usually keep a crisp texture as they get larger. Provided they feel brittle (snapping rather than bending), they are good to go. I scrape off the spines of larger hedgehog mushrooms before pickling. This is by no means essential, but means you won’t be “clagging up” your pickle with lots of tiny spines, which isn’t especially nice texturally. Use 2-3cm hedgehog mushrooms whole, or cut larger ones to approximately that size. I like pickling hedgehog mushrooms with soy sauce, horseradish and star anise in the pickle mix.
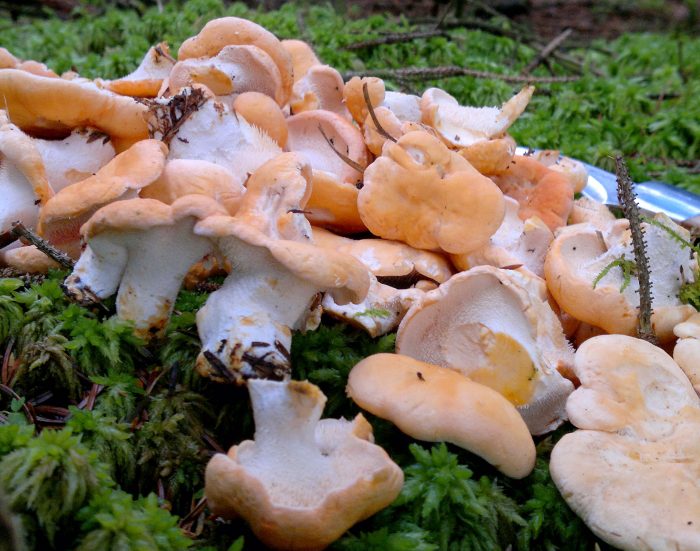
Small firm hedgehog mushrooms are best for pickling – check that the flesh snaps rather than bends
Saffron milkcaps or false saffron milkcaps – These are one of the go-to pickling mushrooms in Italy on account of their lovely crisp texture. The challenge in the UK is to find specimens that aren’t full of maggots! I am lucky to have an open, windy spot where hundreds of false saffron milkcaps appear in short grass each October, keeping bug infestation to a minimum. Unless you are confident your saffs are bug free (or you aren’t squeamish about “extra protein”), I recommend splitting even the small buttons down the middle to assess them before pickling. Don’t assume they are infested just because you see hollow-stipes – they are naturally like this. If you add some actual saffron to the pickle mix it brings up the colour and tastes good too.
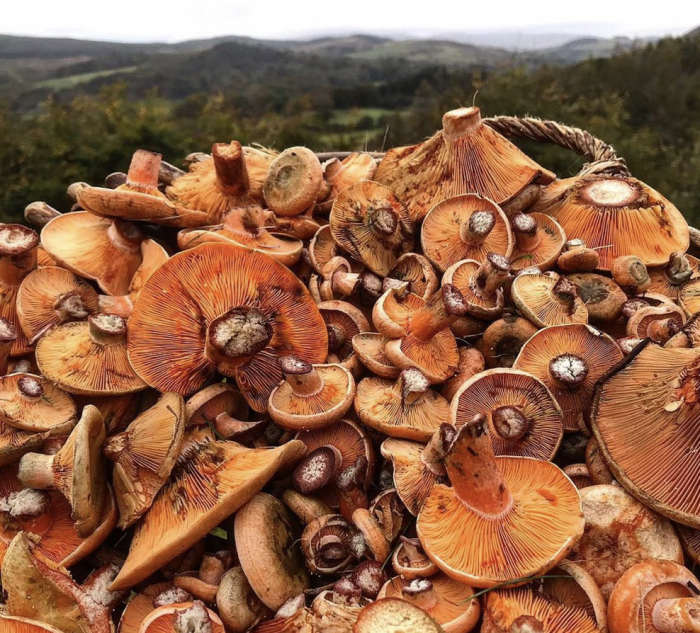
False saffron milkcaps, Lactarius deterimus, are a good crisp mushroom for pickling…IF you can find bug-free specimens!
Honey fungus – These are a great mushroom for pickling when the caps are young and convex, with the the gills still white. They are a very popular pickling mushroom in Poland (where they know a thing or two about fungi) and can often be harvested in enormous quantities. Discard the stipes (or add to the stock pot) as they tend to be tough and hard to digest. When pickling “more digestively challenging” mushrooms where boiling is recommended, the pickling stage outlined below (ie. simmering the mushrooms in your pickle solution) is adequate as the pre boiling stage, provided you then discard the pickling solution. The pickled mushrooms can then be stored under oil (also outlined below). When pickling honey fungus, I use honey as the sweetener in my pickle mix. I first did this purely for the fun of making “honied honey fungus”, but its pretty tasty so its become a go-to.
Hen of the Woods – Just one good hen of the woods can provide meals for weeks with plenty left over for pickling, so its worth developing some go-to pickling recipes to deal with those sudden gluts. Their firm, meaty texture holds up really well. I break them up into approximately 2cm wide by 6cm long fronds which look great when pickled, or cube the solid hearts into 2cm x 2cm cubes. Particularly good pickled with soy and/or miso.
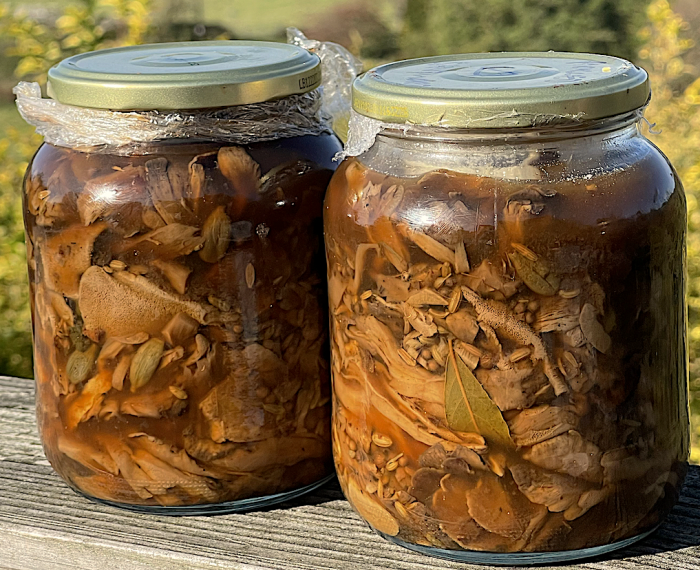
Pickled hen of the woods, with miso and ginger
Penny Bun/Cep/Porcini – Fabulously flavoursome for pickling, but take care to check for infestation and make sure their texture is still firm. If you are lucky enough to have lots of firm, young bouchon cep (ie.like a champagne cork), these can be pickled whole or split down the middle. Larger, but still firm ceps can be cubed. I only pickle them when the pores/tubes are still white or just beginning to yellow. Although I harvest a lot of penny buns each year, such a small proportion of them are crisp and bug-free, that I tend to keep them for using raw in salads – about the nicest thing you can make with mushrooms! The vast majority are older, softer and have some passengers – best de-bugged and preserved by dehydrating. Other edible boletes can also be pickled when young and firm, but I tend to avoid using soft/spongy textured specimens or species (such as brown birch boletes, slippery jacks, xerocomus spp etc).
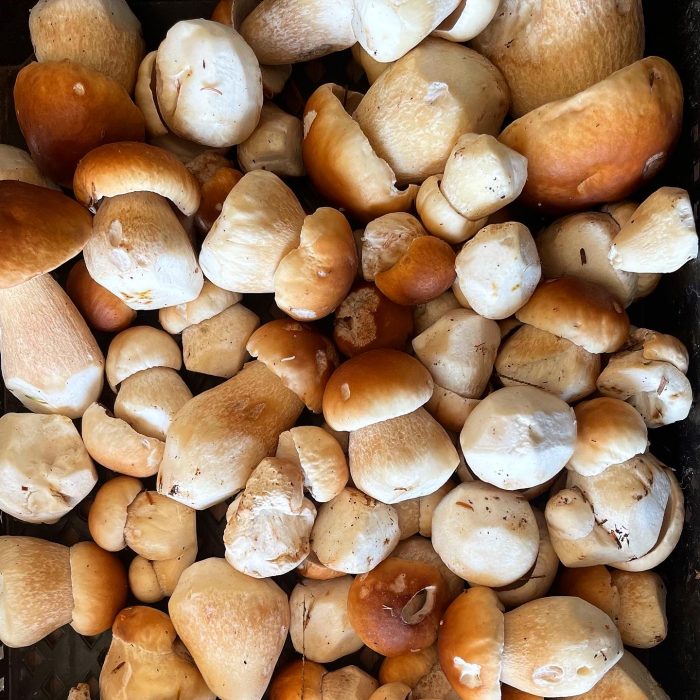
Pristine bouchon (ie. like a champagne cork) penny buns work best for pickling.
Cauliflower fungus – If you can find them in good condition, the crisp, cartilaginous texture of cauliflower fungus works really well pickled. The challenge, as always with cauliflower fungus, is cleaning out the conifer needles and other woodland debris that they incorporate as the grow without tearing them to shreds. The coral-like fronds make very attractive pickles, or chop the denser cores into 2-3cm cubes. Their piney aromatics can be enhanced by using a conifer-infused vinegar.
Late season leaf-rotters such as Wood Blewits and trooping funnels. If you catch them young and firm these late-season specialists pickle well and can often be had in large quantities. Still having a convex cap is a good sign for blewits, while trooping funnels often remain firm-fleshed and bug-free when fully funnel shaped. You should read up on digestibility in the links provided. When pickling “more digestively challenging” mushrooms where boiling is recommended, the pickling stage outlined below (ie. simmering the mushrooms in your pickle solution) is adequate as the pre boiling stage, provided you then discard the pickling solution then store the pickled mushrooms under oil (also outlined below).
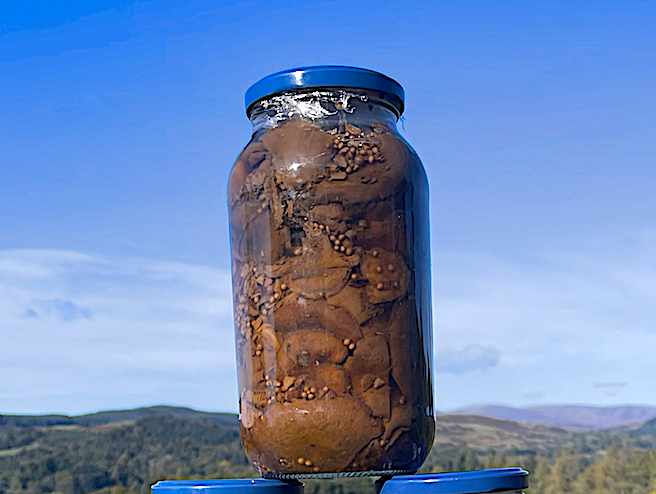
Pickled wood blewits, with garlic, angelica and coriander
Winter chanterelles – these are different from the rest of the species I recommend for pickling in so far as the are quite flimsy, flexible and hollow, becoming quite flaccid after hot pickling. They still have good flavour and an enjoyable texture though. Their hollow stipes can trap air, so check for air bubbles with extra care, especially if you are preserving them under oil after pickling (see below for more details on this). The only jar of pickled mushrooms that has ever gone off on me was a a jar of pickled winter chanterelles stored under oil.
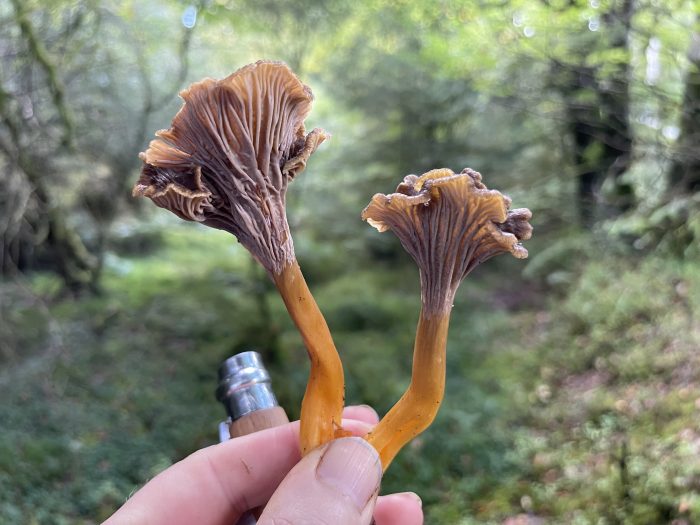
Winter chanterelle, trumpet chanterelle, craterellus tubaeformis. Each one a work of art! ©GallowayWildFoods.com
Brittlegills such as charcoal burners and young blackening brittlegills (Russula nigrescens – when still cream coloured) have excellent crisp textures for pickling provided they are in good condition. They are susceptible to bugs and deteriorate quickly, so use only the finest specimens, and even then, check for infestation.
Amanitas. Edible members of the amanita family such as the blusher and fly agaric pickle well provided you get them before they get buggy (which happens fast!). Please read up on the safe preparation of these species in the links provided – they should not be eaten without boiling first. Its fine to use your pickling solution as the boiling part of preparing them, provided you discard it afterwards. I’d then recommend rinsing the pickled amanitas in fresh water before putting in jars and storing under oil, as outlined below.
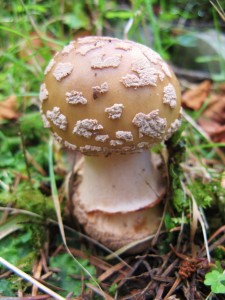
Firm young blushers pickle well, but you should rinse them and dispose of the pickling solution after pickling, then store in oil
Pickling Dried Mushrooms. Its possible to pickle dried mushrooms from their dried state, without rehydrating them first. They will be rehydrating entirely in the pickling solution, so you might want to knock back the acidity a bit.
Preparing wild mushrooms for pickling
Make sure your mushrooms are clean, firm, bug-free and not soggy.
Sort mixed baskets, keeping firm specimens for pickling and the rest for cooking or preserving in other ways.
Small mushrooms up to 4cm across the cap can be left whole, medium sized ones halved or quartered, and large ones sliced (about 1cm thick) or cubed (about 2cm x 2cm). This isn’t a precise science – apply your own taste, intentions and aesthetics: you’ll find your mushrooms quite forgiving. See also my recommendations around different species above. Your mushrooms can shrink to up to half their size during the pickling process.
Once sized or chopped, it’s helpful – but not essential – to displace some of the moisture in the mushrooms before pickling – especially if they were harvested on a wet day. This can be done by just keeping them in the fridge in an airy basket for a few days, but it’s better to actively dry them a little beforehand. I pop them in a dehydrator on a low heat setting for an hour or two. If you don’t have a dehydrator, a wire rack on a sunny window ledge or in a warm, airy location works fine.
You are looking for your mushrooms to be dry-ish, but not fully dehydrated.
If you don’t want to bother with this stage, you’ll still get nice results, but I recommend increasing the acidity of your pickle mix a little, as it will be diluted somewhat by the moisture remaining in the mushrooms.
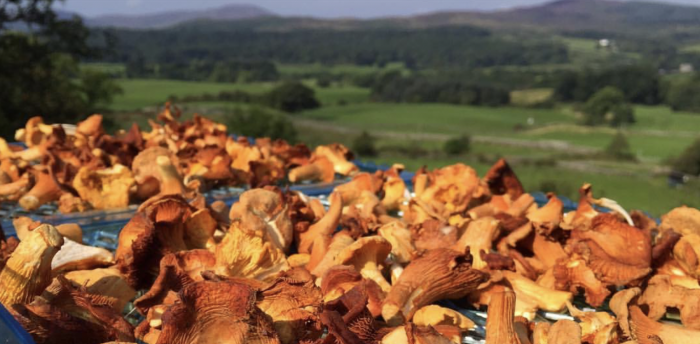
Partially drying chanterelles on a sunny day. Mushrooms absorb vitamin D through their gills/pores if left upturned in bright sunlight. Those shown here have reached a nice dryness for pickling.
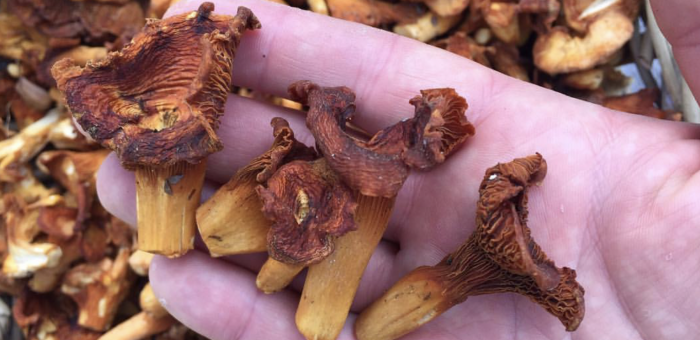
During hot dry spells chanterelles can dry and wither a little. These are still good candidates for pickling!
General principles and some science around pickling mushrooms
We pickle things for two reasons: to preserve them, and to make them more (or differently) delicious.
The basic principle of pickling mushrooms is to cook them in an acidic solution. After pickling they can either be stored in their pickling solution, or in oil. This post focuses on using vinegar to provide that acidity. It is also possible to ferment mushrooms so that they are preserved in lactic acid, but that is not the focus of this post. See here for guidance on lacto fermentation (though be aware that mushrooms often require extra help to ferment, and different species can require quite different treatments – but that’s a blog for another day!)
Vinegar is an acetic acid based solution, which can be produced from a number of sources such as apples, malt, white/red wine etc – see my thoughts on which vinegar to use below.
Cooking mushrooms (or whatever you are pickling) in vinegar increases their acidity. Acidity is measured on the pH (an abbreviation for “potential of hydrogen”) scale, with a pH of 7 being neutral – neither alkaline or acidic – such as pure water. As the pH of a liquid gets lower, its acidity is getting higher. Microbes that spoil food are unable to grow in a pH of 4.6 or lower. (This is why vinegar is often used as, or in, cleaning products).
Most store bought vinegars have a pH between 2 and 3 (2.2 is common). Undiluted lemon juice has a similar pH.
Pickling in undiluted vinegar is rather too acidic in the mouth, oesophagus and stomach for most people (though I do know some serious vinegar-lovers who enjoy the burn!). This is why pickling is generally not as straightforward as just pouring vinegar over something – unless you are into mouth ulcers and heartburn.
Furthermore, using strong vinegar can corrode the foodstuff you are trying to preserve into acidic mush, and overpower all but the least subtle flavours.
The skill in pickling is to preserve things and make them (more, or differently) delicious. Tastes can vary, but most humans enjoy the combination of sweet and sour – think of tasty cocktails, sauces, chutneys and fruits – they almost always have a pleasing balance of sharp and sweet. So by diluting and sweetening our pickling vinegar, while keeping its pH below 4.6, we can make delicious preserves that keep well.
The cell walls of mushrooms are composed of a substance called chitin (pronounced kI-tin). This is the same substance that makes crustacean exoskeletons (shells) hard. It is the presence of chitin that stops mushrooms breaking down in the same way as vegetables if boiled for prolonged periods. If you’ve ever put button mushrooms in a slow cooked stew at the same time as potatoes, this difference becomes clear – two hours later the potatoes have disintegrated while the mushrooms still look like, and have the texture of, mushrooms (if somewhat shrunken!). Our modern obsession with al dente vegetables does not translate to mushrooms – they remain al dente after extended periods of cooking. In many mycophillic Eastern European countries, most mushroom cookery begins with boiling the mushrooms. I still recall the shock and disbelief on the face of a group of Ukrainians I was cooking mushrooms for when I started frying them without any pre-boiling!
It is this property that makes mushrooms great for pickling – they can be simmered in the pickle solution to cook and preserve them while still retaining their texture.
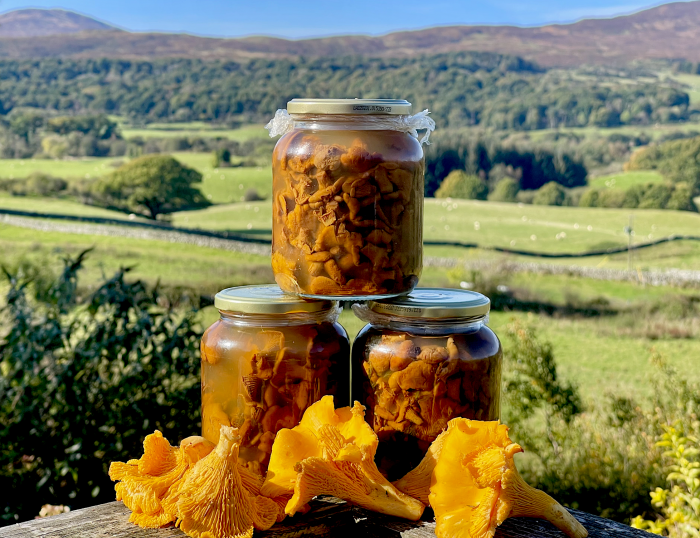
Pickled chanterelles with spignel and apricot. ©GallowayWildFoods.com
Which Vinegar to Use for Pickling Mushrooms?
Choice of vinegar for pickling is a matter of personal taste and what you have readily available. I generally recommend avoiding strongly flavoured vinegars such as balsamic or malt vinegar as they can mask the flavour of the mushrooms (but do by all means experiment with them if they float your boat!).
More neutrally flavoured vinegars such as apple cider vinegar, white vinegar, white wine vinegar or rice vinegar are generally the best candidates. Intensely coloured vinegars such as red wine vinegar will discolour your mushrooms, so I tend not to use them, though this is more of an aesthetic rather than flavour based judgement.
My personal go-to vinegar is organic apple cider vinegar because its delicious yet unobtrusive, and is local to where I live in SW Scotland. It is a golden-brown colour so tends to dull down the colours of what you are pickling with it more than, say white vinegar or white wine vinegar.
I have also successfully used home made vinegars such as elderflower vinegar, fermented from past-its-best elderflower champagne or other floral wines or champagnes.
Vinegars flavoured by infusion of fruits etc can also be used, but they bring strong flavours of their own, so select carefully. For example, I love and make gallons of sweet elderberry vinegar each year, but don’t use it for pickling mushrooms as its too sweet and fruity.
Once you have chosen your vinegar, you might wish to infuse it with something that compliments your mushrooms – see my notes on this below – but if you are new to this, maybe best to start with a simple, unadulterated 3-2-1 pickle and build from there. You’ll soon progress to doing it by taste alone, and adding all sorts of spicy embellishments!
Basic Mushroom Pickling Recipe – The 3-2-1 Pickle
As discussed above, pickling in vinegar alone is too pungent for all but the most leathery digestive tracts. A good starting point for a tasty balance of acidity and sweetness is a 3-2-1 ratio of dilution which means 3 parts water to 2 parts vinegar to 1 part sugar. Salt is also usually added too, as both seasoning/flavour enhancer and to further improve keeping qualities. (These proportions work for pickling many things, not just mushrooms – for example see my recipe for salted pickled wild garlic buds here.)
Ingredients:
- 300 ml water
- 200 ml apple cider vinegar (or other vinegar)
- 100 g of white sugar (OR 100 ml of simple* sugar syrup**)
- A generous pinch of salt
- About 1kg of mushrooms for pickling
- Jars with tight-fitting, rubber sealed lids. (If your jars don’t use rubber seals, the pickling solution can corrode the lids – see my top tips below)
*A simple sugar syrup is where the same weight in grams of sugar is diluted in the same volume in millilitres of water.
**Note that some variations in dilution will occur depending whether you are adding your sugar dry, or as syrup (which contains water, so will increase dilution). This shouldn’t bring you anywhere near safety limits, so you can still rely on taste to find the right balance for you. If you are nervous about this, start by using dry sugar.
This 3-2-1 ratio will result in raising a vinegar with a pH of around 2.5 to a pH of around 3 – so still a long way within the safe threshold of <pH4.6. Even if your starting vinegar is closer to a ph of 3, the final ratio will still be under pH 3.5***.
***Note that the relationship between pH and dilution is not direct but logarithmic, meaning each whole pH value below 7 is ten times more acidic than the next higher value. For example, pH 3 is ten times more acidic than pH 4. So halving the pH is not as simple as adding the same volume of water to your vinegar. If you are nervous about diluting your vinegar to point where it is ineffective as a preservative, you should find this ready reckoner reassuring.
I suggest the 3 water : 2 vinegar : 1 sugar ratio as this as a safe and tasty starting point from which you can explore your own preference for balancing the flavour of your pickles.
Personally, I like a sharper pickle, so I often equalise or reverse the 3 water and the 2 vinegar (so 2-2-1 or 2-3-1). This can vary a lot depending on what i’m pickling, what I want to use it for, how long I’d like it to keep for, and at what temperature I intend to store it. Often i’ll cut back the sugar, some people omit it altogether. What i’m saying is you needn’t be too precious about sticking exactly to the 3-2-1 ratio, and should taste your pickling solution and tweak it to your taste as you make it, and as you gain more confidence in your pickling skills. Unless you drastically cut the amount of vinegar, you’ll need to add a lot of water to pass the 4.6 pH threshold. If your pickle mix becomes that dilute, i’d suggest that pickling isn’t the preserving process for you!
I recommend going a little sharper (ie. more acidic) than your ideal mouth-feel, as the intensity of the flavour will be softened by the mushrooms, and possibly by oil too if you go down that route (see below).
Method:
- Mix water, vinegar, sugar and salt in a pan. If using dry sugar, heat/stir until sugar is dissolved. This is your basic pickling mix
- Add your prepared mushrooms to the pan and bring up to the boil
- Turn the heat down so they are just below simmering for 20 minutes
- Spoon your pickled mushrooms while still very hot into very clean jars
- Top the jars up with the pickling solution while its still very hot (or see my instructions for keeping your pickled mushrooms in oil below)
- Screw the (very clean) lids on the jars while everything is still hot and leave to cool
- Store in the fridge* – keeps for many months, but eat within a couple of weeks once opened (and don’t dip into the jar with dirty spoons!)
Treat this as your “foundation recipe”, which you’ll soon build on. There are also all sorts of twist and infusions you can do to make your pickled mushrooms nicer, and I’ve detailed these below.
*If you have been scrupulous with your hygiene, and have kept the acidity quite high, you could store them in a cool pantry or garage. But best to use the oil method outlined below if you really don’t want to use up fridge space.
Pimp Your Pickle: Pre-infusing Vinegar Before Pickling
You can embellish your pickled mushrooms by adding herbs and spices to your basic pickling mix. Some work better cold infused into the vinegar (or sugar syrup) before making your pickle mix, while most should be added to the mix then lightly simmered for 10 minutes or so to infuse their flavours. They can be strained out before mushrooms are added, or left in the mix. I generally leave them in the final jar of pickled mushrooms, to infuse even more of their flavour and add spicy flavour-bombs to the eating experience.
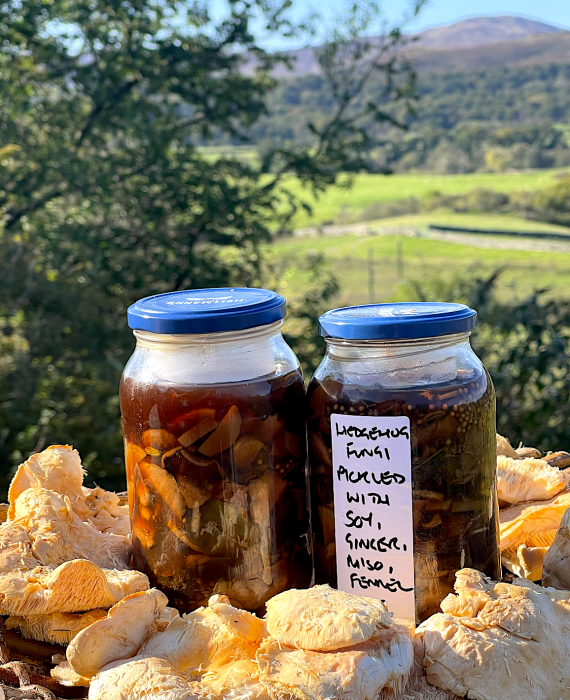
Pickled hedgehog mushrooms with soy, ginger, fennel and horseradish. ©GallowayWildFoods.com
“Classic” pickling spices include the following dry spices, all of which should be heated in the pickle mix to infuse their flavours for 20 minutes or so before adding the mushrooms. (You may wish to toast them in a dry frying pan to wake them up first):
- Bay leaves
- Mustard seeds
- Coriander seeds
- Fennel seeds
- Star anise
- Black peppercorns
- Chillies
- Juniper
In addition, fresh herbs, spices and flavourings that also work well in pickles include the following (again, these should be pre-simmered in the pickle mix to infuse their flavour):
- Horseradish
- Garlic – sliced thinly
- Fresh ginger – slice thinly
- Fennel – leaves or green seeds or dry seeds
- Dill
- Lemon peel
- Soy sauce
- Miso paste
I use a lot of wild herbs and spices in my pickles, most of which you can read about in my post on Wild Spices of the UK, or in the links below:
- Ground ivy (Glechoma hederacea)- this is my absolute go-to wild herb for infusing into vinegar before pickling. It adds complex punchy aromatics and like most members of the mint family, readily infuses into vinegar: just add plenty of fresh ground ivy – leaves, stems and flowers – to your vinegar and leave for a day or more. No heating necessary. I always have a 5 litre bottle of apple cider vinegar full of ground ivy in my store room.
- Alexander seeds – black or green
- Angelica seeds – dry or green
- Spignel seeds – dry or green
- Wood avens root – I usually add this in the form of wood avens root syrup (see link for recipe), as part of the sweet element in the pickle mix
- Sweet cicely – leaves or green seeds
- Wild garlic – green seeds (fresh wild garlic leaves lose their pungency very fast during pickling, leaving you with tasteless mush. If you want to preserve them, see my article on lacto-fermentation).
- Common hogweed seeds – green or dry
- Pineapple weed – fresh leaves or flowers – cold infused or hot infused
- Conifer needles – pine infused vinegar is particularly good for pickling cauliflower fungus
Pickled Mushrooms in Oil
Keeping pickled mushrooms under oil is a traditional way of preserving them even longer, and without the need to refrigerate them. It also adds a delicious oily balance to your pickles (think of the pleasures of oil and vinegar salad dressings), and you can still use the oil as you use the mushrooms – it will take on some of their flavour. Use a good quality neutral tasting oil such as olive oil. No need to use your finest extra virgin olive oil unless you want a more intense oil flavour.
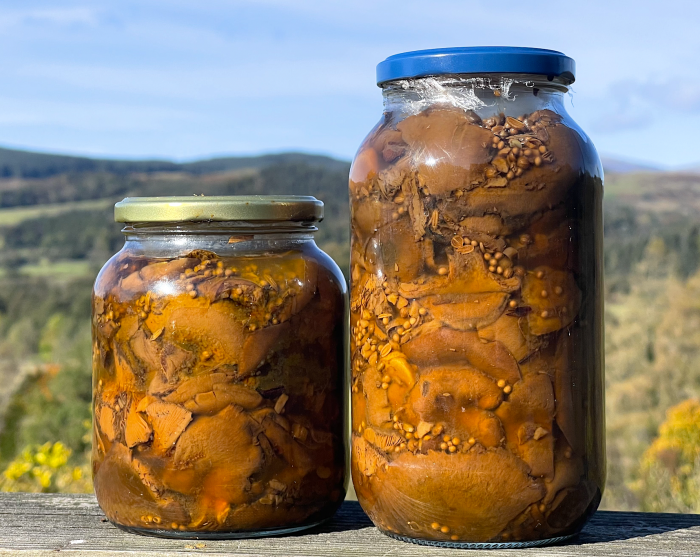
Saffron milkcaps pickled with spices, preserved under oil.
I recommend increasing the acidity of your pickle mix (eg. 3 vinegar : 2 water : 1 sugar) for the oil method, as the oil mellows the acidity when you eat them.
Be extra scrupulous about the cleanliness of your jars for this method, especially if you intend to store them out of the fridge. There is information here on heat sterilisation.
Method:
- Follow my basic pickling instructions above up to the point where you fill the jars with mushrooms (and any pickling spices you’d like in the jar).
- While the mushrooms are still very hot, pour the oil into the jar
- If you see air bubbles in the mushrooms, use a very clean spoon to push the mushrooms down until there are no (or minimal) air bubbles.
- Screw the lids on tightly and leave to cool
- Can be stored at ambient temperature. I wouldn’t recommend leaving them in a warm house though. If you store them in the fridge, the oil will likely go solid and opaque – allow them to warm to room temperature before using.
My Top Mushroom Pickling Tips
It can be hard to judge the right amount of pickling solution for any given amount of mushrooms. You can avoid making a surplus by stuffing your fresh mushrooms into the jar you intend to use, then adding your wet pickling ingredients by measured increments (eg. 100ml at a time) to the mushroom-filled jar until it is full. Then pour the pickling solution into the pan, add any spices you are using and carry on. Be sure to really stuff your mushrooms in, as they will shrink considerably when cooked in the pickle mix.
If you have surplus pickling solution, this keeps perfectly well in clean jars/bottles until your next pickling session.
I sometimes re-use the pickling solution from a (consumed) jar of pickled mushrooms, provided they haven’t been hanging around opened for weeks. When doing this I taste the pickle mix and add more vinegar to “top up” the acidity, salt, and perhaps spices.
To improve keeping qualities of pickled mushrooms (especially if I intend to keep them for a long time), I use a very clean yogurt pot or small plastic tub, trimmed to size, to keep the mushrooms under the pickle solution or oil. By picking the right sized tub and cutting with scissors across its radius, it can be squeezed into place above the mushrooms, while letting pickling solution/oil through, and held in place by the cap or shoulder of the jar.
If you don’t have jars with glass lids and good rubber seals, or if your pickles might get shaken about a bit (say, if you post them to a friend), fold cling film into a few layers, place on the jar and screw on the lid. This will prevent corrosion of the lid.
Learn what your preferred balance of vinegar, water and sugar is – you’ll quickly be able to make pickle mixes by taste alone.
How To Eat Pickled Mushrooms
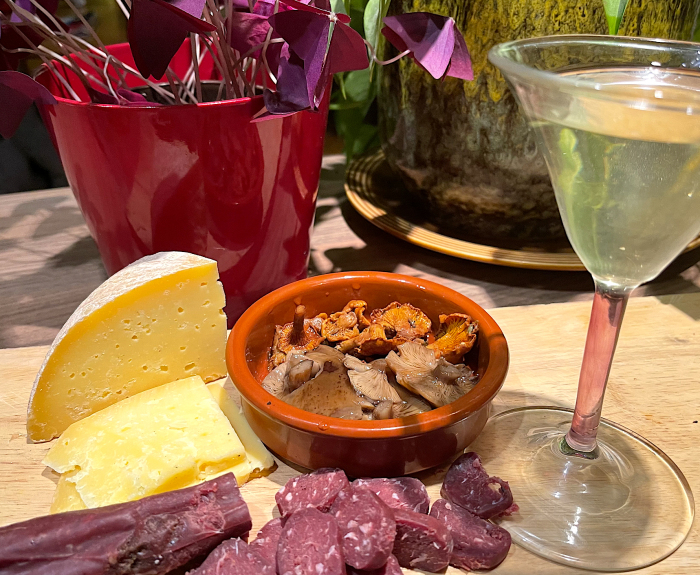
My go-to pre-dinner nibbles – venison chorizo, local cheese, pickled honey mushrooms and chanterelles with a very boozy martini.
When and where you eat your pickled mushrooms will depend on what species and embellishments you have used. Here are some ideas.
- With cheese
- Mixed through salads
- On the side of hot dishes (like a relish)
- On pizzas
- In sandwiches or on toast (under melted cheese)
- With charcuterie
- In or with wild sushi
- As antipasti
- By the jarful (for pickle/fungi addicts!)
- In/with a Fithy Dirty Forager’s Martini
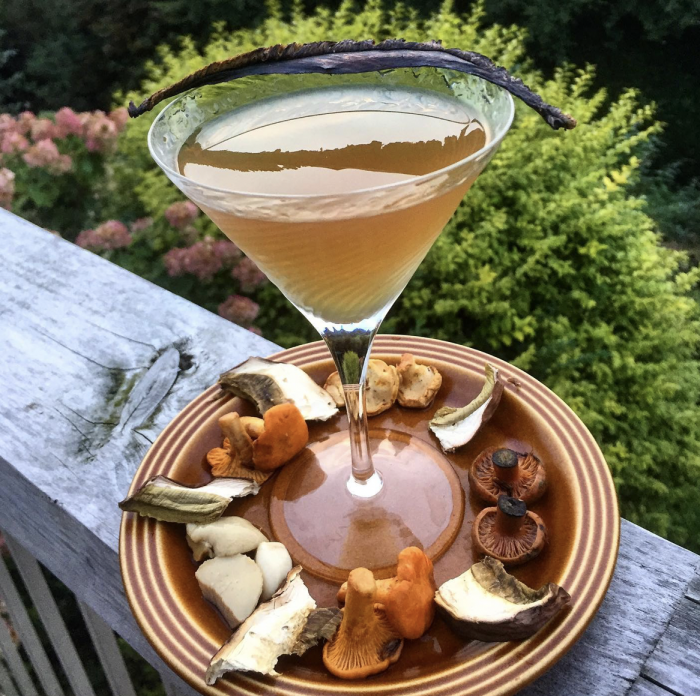
Fungi(n) martini with mushroom preserves…
-Botanist Gin, stirred with my 8 mushroom vermouth & mushrumami
-Chanterelles pickled in sweet elderflower vinegar
-Cep crisps
-False saffron milkcaps pickled with mousseron & scots lovage
-Beefsteak mushroom & elderberry jerky
-Hedgehog mushrooms pickled with angelica
-Cep in hazelnut oil
-Sweet pickled wild spiced chanterelles with sea lettuce
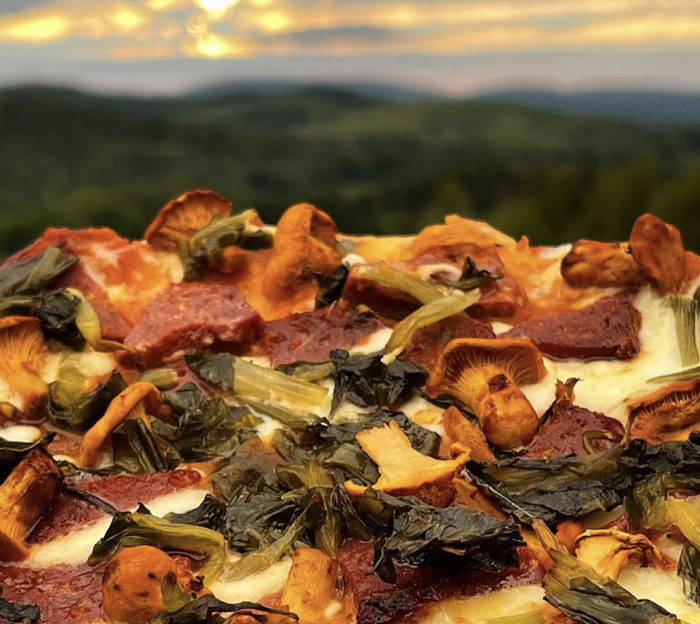
Pizza with venison salami, pickled chanterelles and fermented wild garlic
3 Comments
Just tried this recipe! Brilliantly informative and easy to follow, thankyou very much!
I was just wondering how long does it keep in the fridge? ( I have sterilised my jars and used the 321 ratio outlined above, I am just terrified of Botulism and want to air on the side of caution. )
I forgot to add that I am not using the oil method and it will be stored in the fridge in glass kilner type jar with a rubber seal.
Hi Emily,
Should be fine for 6 months, then store in fridge and use within 2 weeks once opened.
Mark